Drooping Head: Head Positioning in Baby Resuscitation
Many parents tilt the infant's head back too far or not enough. This article explains the neutral head position for infants, why it differs from adults, and how laypeople can properly open the airway.

Author: Dr. med. univ. Daniel Pehböck, DESA
Specialist in Anesthesiology and Intensive Care Medicine, AHA-certified ACLS/PALS Instructor, Course Director Simulation Tirol
Reading time approx. 8 min
When a baby stops breathing, every second counts. You know that – and yet in the heat of the moment, it happens to almost everyone: the little one's head gets pushed too far back or stays in an unfavorable position. Both can mean that despite all your efforts, no air reaches the tiny lungs. The correct head position is the first and perhaps most important step in infant resuscitation. It determines whether your rescue breaths reach their destination or go nowhere. This article shows you step by step how to correctly position a baby's head, why the technique is fundamentally different from that used for adults – and how to commit this life-saving skill to memory so you can perform it confidently in a real emergency.
Why the Head Position Is So Critical
To understand why head position matters so much in babies, a simple image helps: Think of an infant's airway as a soft, flexible drinking straw. In an adult, this "straw" is relatively firm and wide. In a baby, it is narrow, soft, and very easily kinked.
When a baby becomes unconscious, the muscles go limp. The tongue – which in infants is proportionally much larger relative to the oral cavity than in adults – falls backward and settles like a plug over the entrance to the trachea. The airway is blocked. No air gets through.
The solution sounds simple: bring the head into the correct position so the airway opens up. But this is exactly where it gets tricky. Because what is correct for an adult – tilting the head well back – is too much for a baby. And what many parents do instinctively – not moving the head at all or even tilting it slightly forward – is not enough.
The Big Difference: Baby Versus Adult
For an adult or older child, the rule is: tilt the head back, lift the chin. This opens the airway like flipping open a pocket knife. This technique works because an adult's airway is relatively stable and is straightened and opened by the extension.
For an infant – meaning a child in the first year of life – the situation is anatomically fundamentally different:
- The back of the head is proportionally large. When a baby lies on a flat surface, the large occiput automatically pushes the head slightly forward. This alone can already narrow the airway.
- The larynx sits higher. In babies, the larynx is positioned significantly higher than in adults. This makes the airway more sensitive to changes in position.
- The trachea is soft and flexible. Cartilage structures that keep the airway open in adults are not yet fully developed in infants. The airway can literally kink from too much pressure or a wrong position.
- The tongue is relatively large. In proportion to the oral cavity, a baby's tongue takes up much more space. Even small changes in position determine whether the tongue obstructs the airway or not.
For all these reasons, a different rule applies to infants than to adults: The head is brought into a neutral position – also called the "sniffing position." Not extended, not flexed, but exactly in the middle.
The Neutral Sniffing Position: What It Looks Like
The term "sniffing position" is very descriptive: the baby's head should be positioned as if it were sniffing a flower. The nose points slightly upward, the chin is gently lifted, and the head is neither tilted back nor bent forward.
Here's how to recognize the correct position:
- Viewed from the side, the ear canal and shoulder form roughly a straight line. The tip of the nose points slightly upward as the highest point – like someone sniffing something pleasant.
- The baby's face points toward the ceiling, not backward and not toward the chest.
- The neck is slightly extended but not forced back. You should be able to feel a gentle, natural curve under the baby's neck – not a sharp kink.
A good comparison: If you look straight ahead yourself and lift your chin ever so slightly, as if you wanted to smell something hovering at nose level – that is the sniffing position. This is exactly the position you need for the baby.
Step-by-Step Guide: Positioning the Head Correctly
Imagine your baby is unresponsive and not breathing normally. You have called for help or asked someone to dial 144 (in Austria). Now you need to act. Here's what to do:
1. Place the baby on a firm, flat surface
Lay the baby on its back – on the floor, a table, or another firm surface. A soft mattress or sofa is not ideal because the body sinks in and the head position becomes harder to control.
2. Kneel beside or behind the baby's head
Position yourself so you can easily reach the baby's head while keeping the chest in view.
3. Place one hand gently on the forehead
Lay your flat hand carefully on the baby's forehead. You don't need to apply pressure – the hand only guides the direction.
4. Lift the chin with one or two fingers of the other hand
Place one or two fingertips on the bony part of the chin (not on the soft tissue under the chin!) and gently lift the chin upward. Imagine you want to point the baby's nose tip slightly toward the ceiling.
Important: Never press on the soft tissue under the chin. Doing so pushes the tongue upward against the palate and blocks the airway even more.
5. Find the sniffing position
Now comes the crucial moment: bring the head into the neutral sniffing position. Don't tilt it further back. Don't let it fall forward. The tip of the nose points slightly upward, and the baby's gaze is directed toward the ceiling.
6. Check whether the airway is clear
Maintain this position and check whether the baby is breathing: look for chest rise, listen for breathing sounds, feel with your cheek for airflow from the mouth or nose. If the baby is not breathing normally, begin resuscitation immediately – starting with five rescue breaths, the so-called "initial breaths."
The Three Most Common Mistakes – and How to Avoid Them
Mistake 1: Over-extending the head
This is the most common mistake. Anyone who has once heard that you need to tilt the head back tends to overdo it. In a baby, this causes the soft trachea to kink like a garden hose. Air doesn't get through despite your rescue breaths.
Correction: Think of the sniffing position. Less is more. If you feel like you're pushing the head noticeably backward, it's probably already too much.
Mistake 2: No head positioning at all
Some parents are too scared in the panic to move their baby's head. They fear they might break something. That's understandable – but without head positioning, the airway remains closed and rescue breathing is ineffective.
Correction: You can gently move your baby's head without causing harm. The neutral sniffing position requires only a minimal, gentle movement. You're helping – not hurting.
Mistake 3: Pressing on the soft tissue under the chin
When you try to lift the chin and grip the soft tissue under the jawbone, you push the tongue upward and close off the airway. It's like squeezing the drinking straw from the outside.
Correction: Only touch the bony edge of the chin – the firm lower edge of the jawbone. Where you can feel bone.
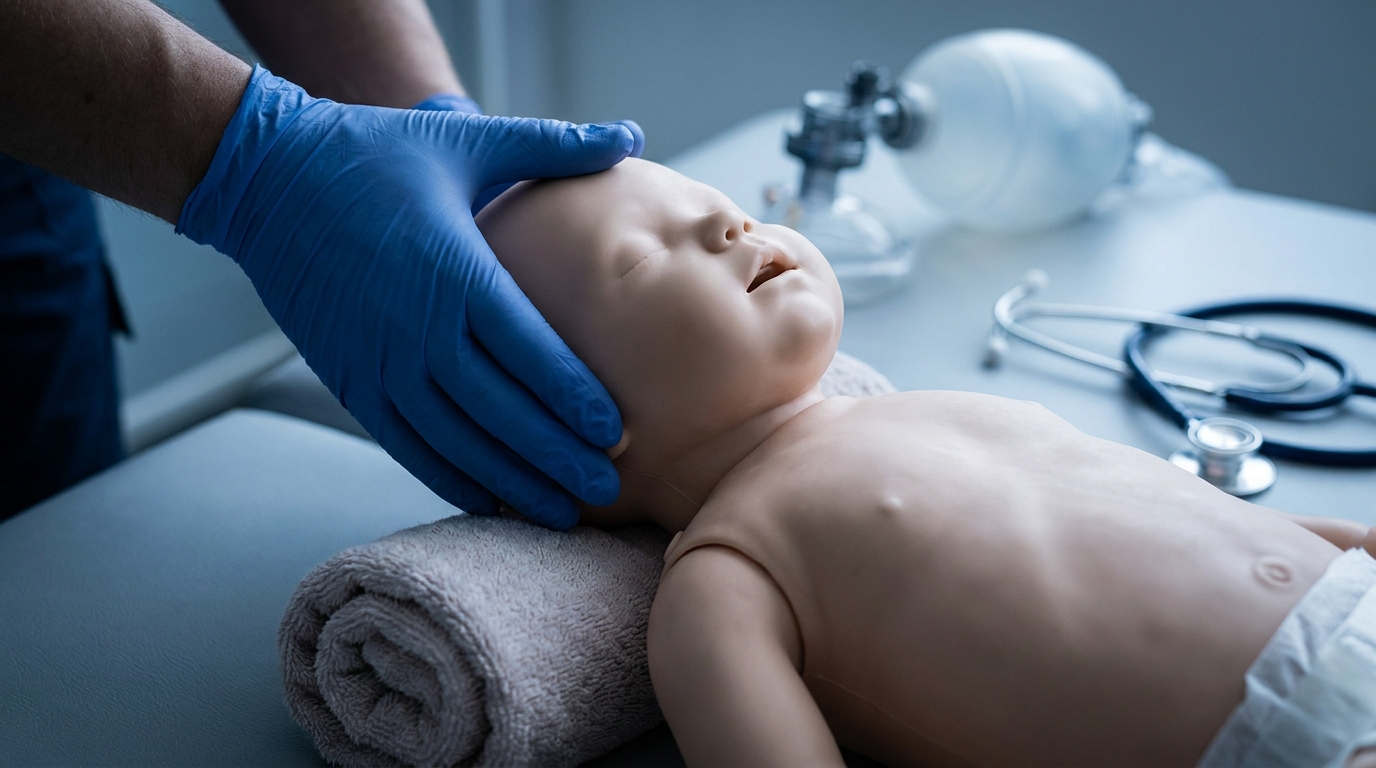
A Helpful Trick: The Rolled-Up Towel
Because a baby's occiput is so large, it can automatically push the head forward on a flat surface. A simple trick can help: place a small, rolled-up towel or a flat cloth under the baby's shoulders. This raises the shoulders minimally, allowing the head to fall more easily into the neutral position.
This trick is not a must – and in an emergency, you shouldn't waste time searching for a towel. But if you happen to have something suitable within reach, it can make positioning easier.
How to Tell the Position Is Correct
Not sure if you're doing it right? Look for these signs:
- The chest visibly rises during rescue breaths. This is the most important sign. If you blow air into the baby's mouth and nose and the chest rises, the airway is open and the position is correct.
- The chest does NOT rise during rescue breaths. Then something is wrong. The most common cause: incorrect head position. Correct the position and try again.
- You feel no resistance when giving breaths. The air flows in easily. It doesn't feel like you're blowing against a wall.
Remember the simple rule: Chest rises = position is correct. Chest doesn't rise = correct the position.
If the chest still doesn't rise after repositioning, a foreign body may be blocking the airway. Take a quick look in the mouth to see if you can spot anything visible. But never blindly sweep inside the baby's mouth – you could push a foreign body deeper.
Maintaining the Head Position Throughout the Entire Resuscitation
Another important point that is easily forgotten: the sniffing position must be maintained throughout the entire resuscitation – not just at the beginning. Between chest compressions and rescue breaths, the head can easily shift. Especially when you're alone and switching between chest compressions and ventilation, the position can quickly be lost.
Take a brief moment each time you switch to rescue breaths to check the head position and readjust if needed. This costs you a fraction of a second and makes your rescue breaths significantly more effective.
Summary: The Key Points at a Glance
- For babies (first year of life), do not tilt the head far back as you would for adults.
- Instead, use the neutral sniffing position: nose slightly upward, chin gently lifted, no over-extension.
- One hand on the forehead, one or two fingers on the bony chin – never press on the soft tissue under the chin.
- A small towel under the shoulders can help but is not required.
- Check: Does the chest rise during rescue breaths? Yes = position is correct. No = correct the position.
- Throughout the entire resuscitation, keep checking the head position.
Practical Training
Head positioning in baby resuscitation reads simply – but getting it right in a real emergency is a completely different matter. Under stress, with trembling hands and a lifeless child in front of you, everything feels different from the theory. That is exactly why hands-on practice is so valuable. In our baby resuscitation course at Simulation Tirol, you practice the sniffing position, rescue breathing, and chest compressions on realistic training manikins – as many times as it takes until every step becomes second nature. You learn what the correct position feels like, how to recognize when something isn't right, and how to act calmly and confidently in an emergency. Because knowledge saves lives – but only if you can actually apply it.
Want to practice this hands-on?
In our Baby-Reanimationskurs you practice this topic hands-on with high-tech simulators and experienced instructors.
More Articles
Respiratory Distress Syndrome in Newborns: Causes and Initial Management
Transient tachypnea, meconium aspiration, and surfactant deficiency – how healthcare professionals and parents can distinguish the most common causes of neonatal respiratory distress and which immediate measures can be lifesaving.
Airway Obstruction in Infants: Back Blows and Chest Thrusts
Detailed lay-rescuer guide for choking emergencies in babies under 1 year: positioning, blow technique, alternating measures, and when to call emergency services.
Baby Not Breathing: Infant CPR for Laypeople
A clear, easy-to-understand guide to cardiopulmonary resuscitation (CPR) for babies under one year of age. This article explains how to check breathing, perform rescue breaths, and give chest compressions with the correct hand position – specifically designed for parents and grandparents with no medical background.